Site under construction — check back daily for updates
Product + Electronics Development
Desktop Mini Fridge
A custom thermoelectric desktop refrigerator developed around temperature control, compact packaging, insulation, electronics, and a fully integrated enclosure.
Type
Thermoelectric Refrigerator
Period
High School
Controller
ATmega328P
Cooling
Peltier Thermoelectric
Development
Product Design + Electronics
Fabrication + Assembly
Project Context
Completed during high school as part of the Advanced Computer Engineering School program at Royal St. George's College. The project was developed as a functional desktop refrigerator for storing solder paste and other temperature-sensitive materials.
01
Project Overview
The project began with a commercial desktop mini fridge and explored how its size, temperature control, efficiency, and enclosure design could be improved through a completely custom-built system.
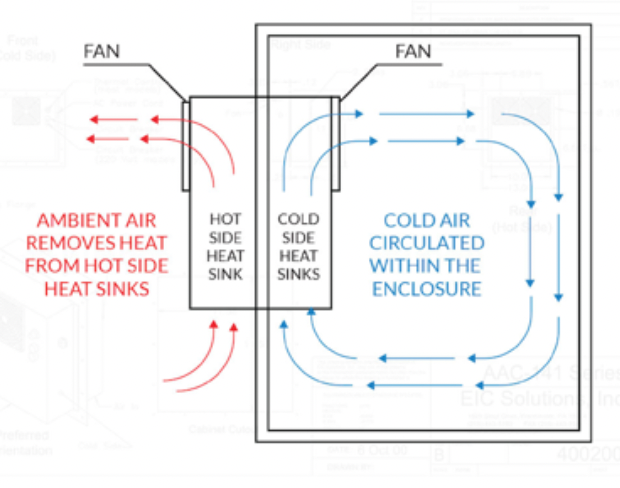
Rather than treating the refrigerator as a collection of separate components, the project was developed around the complete thermal and physical system. Cooling, airflow, insulation, electronics, interface design, and enclosure geometry all had to operate within the same compact volume.
Development was divided into six areas: refrigeration theory, Peltier cooling, control electronics, the LCD interface, enclosure design, and final assembly.
02
Thermal System
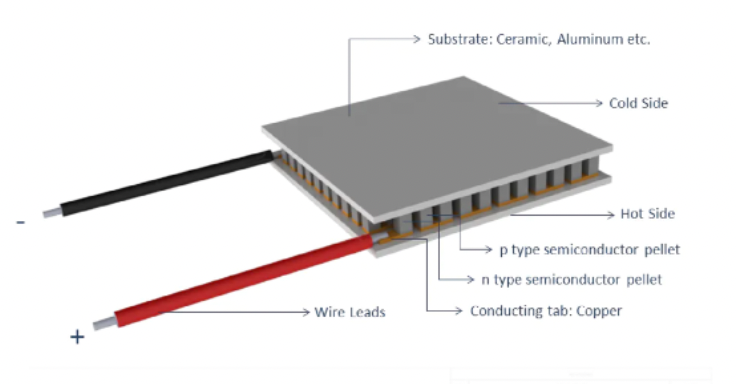
Cooling was produced using a Peltier tile, creating a solid-state refrigeration system without a conventional compressor.
01 / Cooling
The refrigerator uses a thermoelectric cooler based on the Peltier effect. Applying electrical current creates a temperature difference across the tile, removing heat from one side while depositing it on the other.
02 / Heat Rejection
Heat generated on the hot side of the Peltier tile is transferred through a heat spreader and heat sink. Twelve-volt CPU fans move air through the rear compartment to remove heat from the system.
03 / Temperature
An LM35 temperature sensor provides temperature input to the control electronics, connecting the thermal system with the electronic control architecture.
Electronics + Thermal Components
Qty.
Rugged Metal Pushbutton
1
ATmega328P
1
555 Timer IC
1
10 µF Capacitor
1
22 pF Capacitors
2
16 MHz Crystal
1
10 kΩ Resistors
6
Voltage Regulators
2
PBNO
3
Peltier Tile
1
Large Heat Spreader
1
Small Heat Sink
1
12V CPU Fans
2
12V 3A LEDs
2
LM35 Temperature Sensor
1
Momentary Limit Switch
1
DC Barrel Jack
1
1.8" Colour TFT LCD
1
Relay Modules
3
Pin Headers + Wiring
03
Heat Spreader Development
Thermal simulation was used to investigate a custom aluminum heat spreader before the final cooling hardware was selected.
The first heat spreader design reached a simulated temperature of 116°C at its centre and 83.72°C at the outer region. The geometry was revised by adding additional fins and concentrating them toward the centre of the spreader.
The second version reduced the simulated temperatures to 74.4°C at the centre and 57.8°C at the outer region. The custom part was ultimately not manufactured because CNC machining costs exceeded $200, so generic heat sinks were used in the final machine.
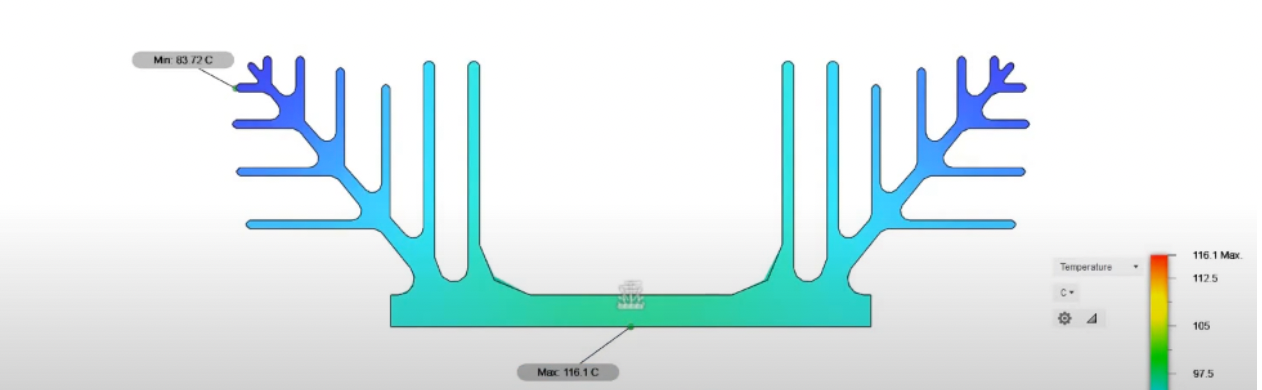
Original heat spreader design
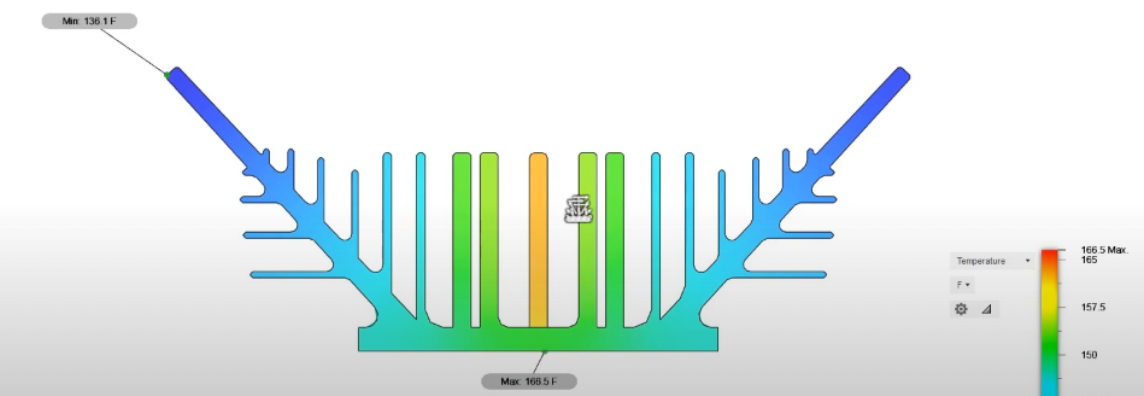
Revised heat spreader design
04
Enclosure Development
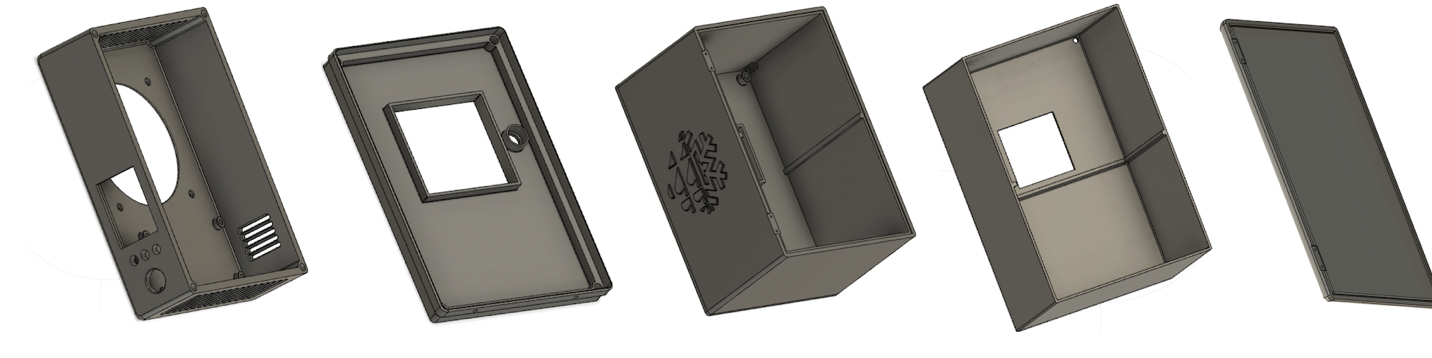
The enclosure was designed around five interdependent parts: the back, heat wall, outer shell, liner, and door.
Rear Compartment
The design began at the back of the refrigerator, where the heat spreader, control electronics, ventilation, and user inputs had to be integrated into a compact service compartment.
Heat Wall
The middle section and heat wall went through ten revisions. The final design separated the thermal zones while allowing the front section to remain removable and the electronics to stay accessible.
Shell + Liner
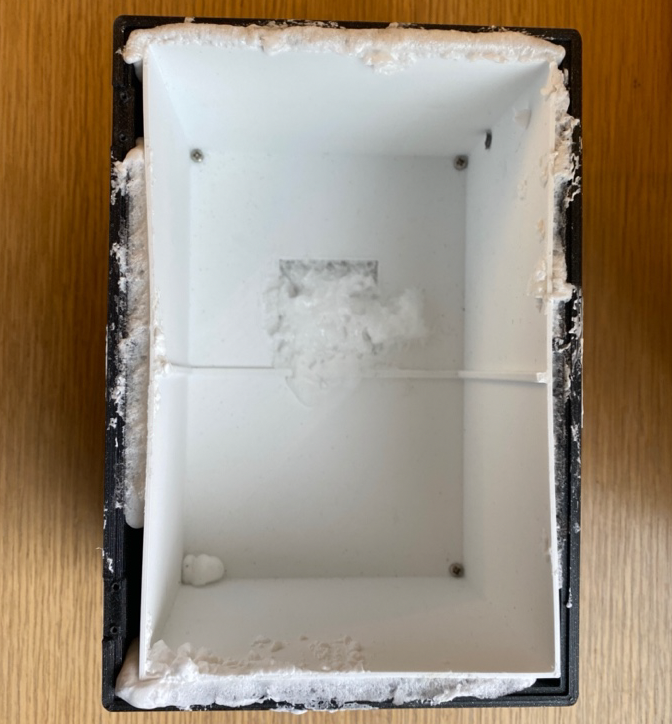
The outer shell created a rigid exterior around the insulation while the internal liner produced a clean refrigerator cavity. The space between them also provided concealed routing for lighting and temperature-sensor wiring.
Door
The door was developed around the completed enclosure and incorporated an inset for the perimeter seal, creating a tight interface with the refrigerator body.
05
Electronics + Interface
Temperature control, cooling hardware, lighting, and the user interface were brought together through a custom electronic control system.
Controller
An ATmega328P forms the main microcontroller platform, connecting the temperature sensor, display, controls, and supporting electronics within the refrigerator.
PCB Development
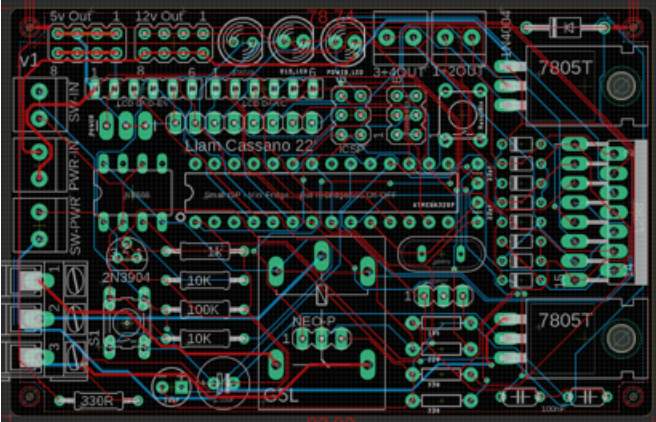
A PCB was designed in Autodesk Eagle using a ground plane for the higher current requirements. Data traces were created using the autorouter while power connections were routed manually.
Control Circuits
The electronics design contained two main circuits: a 555 latch and the temperature-control circuit. A Perma-Proto board was ultimately used to assemble the final control circuit.
Display
A 1.8-inch 128 × 160 colour TFT display communicates through SPI and provides the visual interface. Although the display included touchscreen functionality, it was not used in the final project because it proved unreliable.
06
Fabrication + Assembly
More than 580 hours of 3D printing were used to move from enclosure prototypes to the final refrigerator assembly.
Playmaker PLA was used during rapid prototyping before the final enclosure was printed in Prusament Galaxy Black. Heat set inserts and M4 hardware created removable mechanical connections throughout the enclosure.
High-density spray foam was used to insulate the heat barrier and walls. A rubber seal was installed around the door frame, while hinges and a latch completed the physical enclosure.
Assembly Components
Qty.
Heat Set Inserts
8
M4 Screws
8
Hinges
2
Latch
1
Self-Tapping Screws
6
High Density Spray Foam
Window Seal Tape
07
Final Product
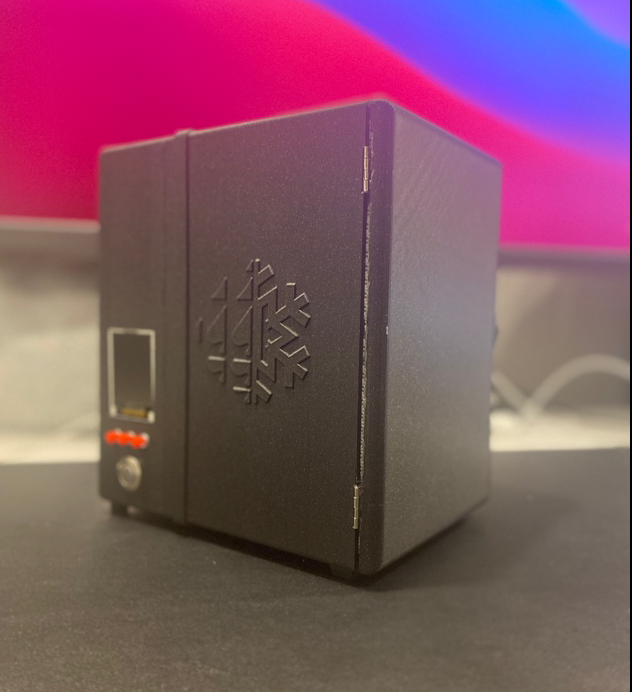
The completed refrigerator brought thermal design, electronics, embedded control, interface design, insulation, and digital fabrication together within a functional desktop product.
The final enclosure concealed the insulation and wiring while keeping the electronics accessible from the rear. Ventilation, cooling hardware, controls, and the display were integrated directly into the product architecture.
After completion, the refrigerator remained in use as a desktop appliance for storing solder paste, fulfilling the original goal of developing a usable product rather than a standalone electronics exercise.
Completed refrigerator exterior
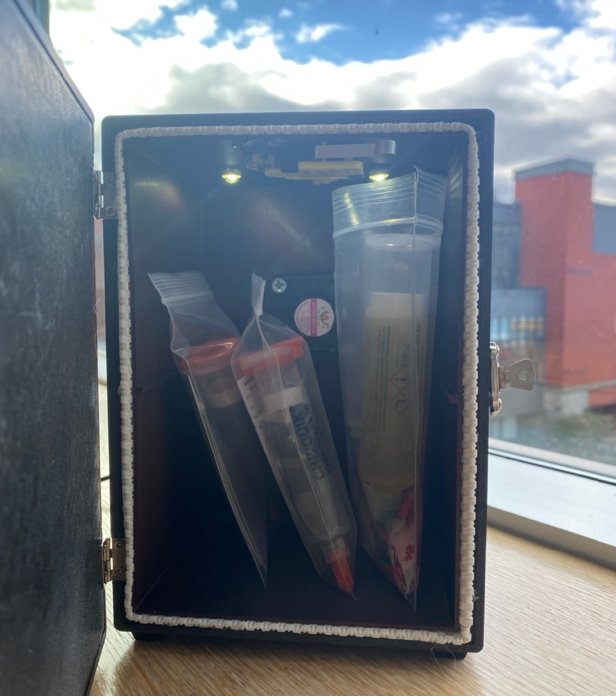
Interior refrigerator cavity